Introduction
A recorded song may be gradually increased from silence at the beginning (fade-in) or gradually reduced to silence at its end (fade-out). With Audio Record Edit Toolbox you can also apply quick fade in/out effect to music.
Step 1. Input an Audio File
Launch Audio Record Edit Toolbox. Click “Home” tab of the Ribbon Command Bar and choose “Open” to activate a browser window, in which you can select an audio file from your computer . Then, click “Open” to input the audio file to program. (You can add more than one audio file to the task window to edit.)

Step 2. Select a Region
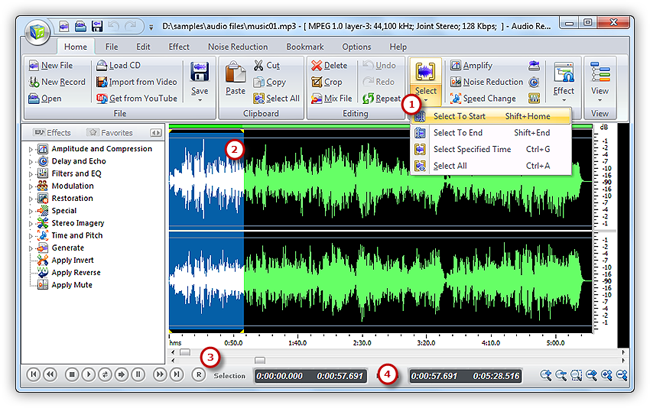
Select the region you want to edit. There are 4 ways to select a region: click anywhere of the waveform as a starting point and use hotkey like Shift+Home, Shift+End or Ctrl+A to select from start/end or all ; click the left button and drag along with the waveform to the place wanted to be selected ; specify the beginner & end of the session by moving the sliders below the waveform window ; Input the start, end and length of time to choose specified region at the bottom of the editor.

Step 3. Add Fade In/Fade Out Effect
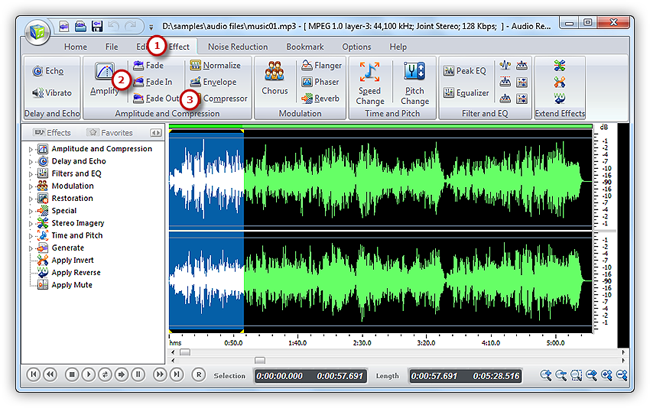
Now click “Effect” tab and there will be many audio effects’ buttons. Click “Fade In” or “Fade Out” to fade in/out over the selected region (Usually we fade in at the beginning of a song and fade out at the end of it).

Step 4. Save the Changes
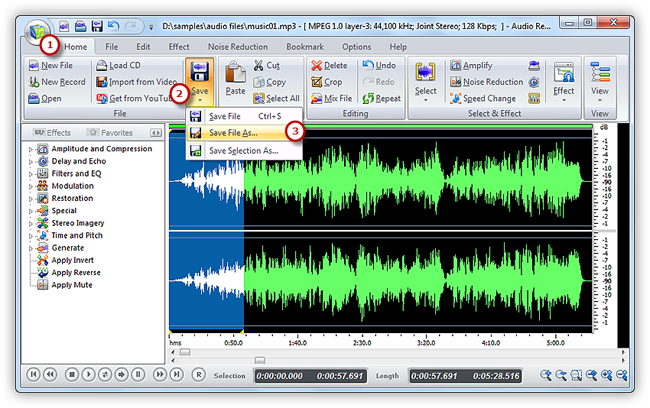
Now go back to the “Home” tab and click the “Save” button to save the changes to the original file or click “Save File As” to save the changes with a different file name and/or location (After that you can select the output folder and format as well as adjust the output quality). Now, have an entertainment with your faded music.

