Introduction
There are so many different reasons why there is a need to edit music. Depending on your resources, you might want to get an expensive program to edit music. However, for most pro and casual music editing, check out our program, Audio Record Edit Toolbox, one of the most powerful pro-level DAW (digital audio workstation) packages on the market.
Step 1. Input an Audio File
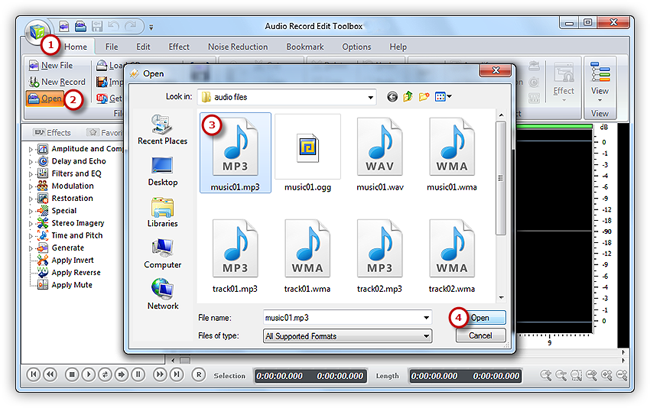
Launch Audio Record Edit Toolbox. Click “Home” tab of the Ribbon Command Bar and choose “Open” to activate a browser window, in which you can select an audio file from your computer . Then, click “Open” to input the audio file to program. (You can add more than one audio file to the task window to edit.)

Step 2. Select a Region
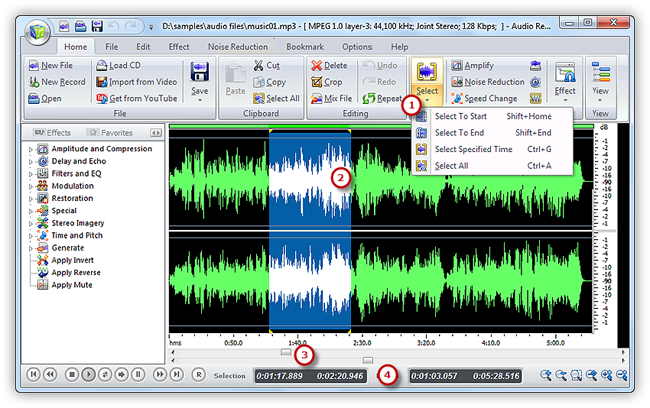
Select the region you want to edit. There are 4 ways to select a region: click anywhere of the waveform as a starting point and use hotkey like Shift+Home, Shift+End or Ctrl+A to select from start/end or all ; click the left button and drag along with the waveform to the place wanted to be selected ; specify the beginner & end of the session by moving the sliders below the waveform window ; Input the start, end and length of time to choose specified region at the bottom of the editor.

Step 3. Edit the Selected Region
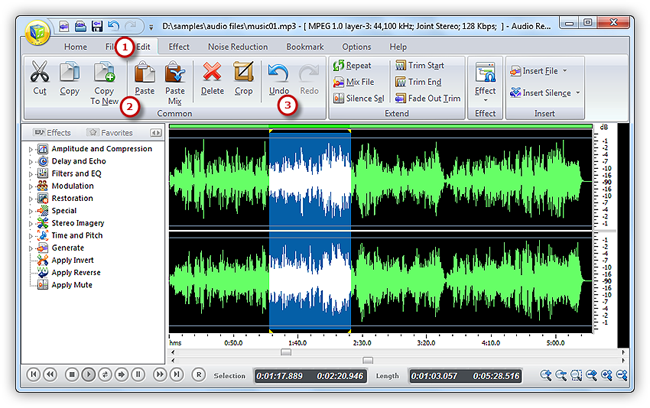
Now click “Edit” tab to edit the selection by clicking the buttons of cut, copy, paste, crop, delete and more . You can use unlimited Undo & Redo to restore some wrong operations made during the editing.

Step 4. Save the Changes
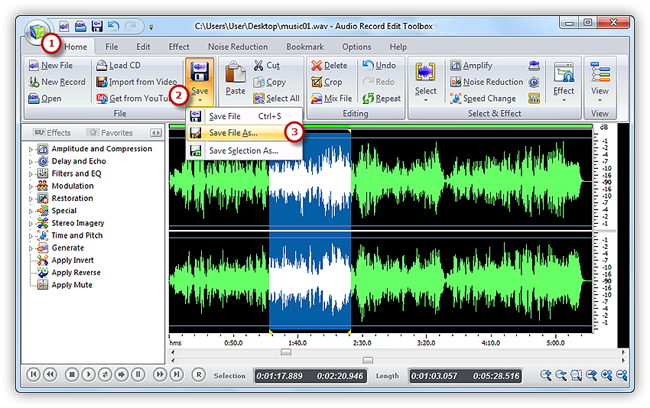
Now go back to the “Home” tab and click the “Save” button to save the changes to the original file or click “Save File As” to save the changes with a different file name and/or location (After that you can select the output folder and format as well as adjust the output quality). Now, have great fun with edited music on your music player!

